
Sunday, January 30, 2011
KITCHEN MIXER
I thought being I put out a recipe today I would also put out a kitchen type of SVG design. I think a person could use this on a scrapbook page of maybe kids making cookies, maybe on a recipe card, maybe on one of those gift jars with a cookie mix in it. You could always add more to it but at least this is the basic design. Have fun with it!
 Click Here to download SVG

CARAMEL ROLLS
Now these Caramel Rolls have always been a hit and I am sure they will be at your house also. Only requirement…follow the directions!
Ingredients:
One – Five loaf package of Frozen White Bread Dough: Now here is where you can mess up. Don’t buy a cheap brand and check the label…it must be fresh. Buy the good brand when it is on sale and throw it in the freezer. Around these parts we have dough made by Rhodes. You can experiment and maybe you have a store brand you like but for your first batch…if you have it…get Rhodes.
2 Cups of Brown Sugar: NOT Dark Brown sugar…regular brown sugar.
2 Sticks of Butter: Yes, it has to be butter. If you think you can get by with margarine, you might as well quit right now. It must be butter and two sticks equals 1 Cup.
2 Cups of New York Vanilla Ice Cream: OK…you better be buying a good ice cream. Do not buy cheap ice cream, it is too full of air and not enough milk fat (cream) in it to make good Caramel Sauce. I use New York Vanilla because it has a wonderful Vanilla taste. If you just can’t get that, add 1 tsp. of Vanilla after you have melted all the other ingredients.
Additional items:
1/4 Cup of Regular Sugar
1 teaspoon of Cinnamon
Baking Spray for pans and top of rolls.
2 – 9 x 13 baking pans. Do not use Air Bake Pans…they just don’t cook as well.
1 pair of Kitchen Shears
The first thing you should do is fill up the sink up with hot soapy water. I always tell people to do this before you start baking or cooking a meal. Your mess will be cleaned up before you are actually done baking. Just a really good habit to get into. Yes, I have a dishwasher but this is just faster.
 |
| I have a plastic pan in my sink so I don't have to fill it all the way up. It saves on water and sewer! Next put the 2 Cups of Brown Sugar, 2 Sticks of Butter and 2 Cups of Ice Cream in a kettle and let it all melt completely. All it has to do is be a smooth sauce. You do not have to cook or boil this, just be sure all the sugar is liquefied into the ice cream and butter. It takes just a couple minutes and be sure to stir occasionally. Set this aside.  Mix the 1/4 Cup of Sugar and 1 teaspoon of Cinnamon in a bowl and set aside. Spray your pans well with the Baking Spray. Next start cutting up the bread dough into a pan. You will need a kitchen shears for this. I am NOT talking about anything but a Kitchen Shears. Everyone should have one and you should covet it as much as you would any sewing shears. You do not use it for anything BUT food! It does not touch anything else. No one else but you or someone you designate to be cook is to touch it. Children under 25 cannot even look at it. You also wash it completely after each use, dry it and hide it again. Or if you do not have one, cut small 1/2 inch pieces on a cutting board with a knife but that might take awhile. I suggest you run to the nearest store and get one. You will love having it anyway! You just snip snip snip the dough into the pan. Shears are good for herbs, cutting candy or fruit for decorations...lots of things! Well worth it! OK...I digress..... You will be using 2 loaves per pan. You will cut up one loaf of dough into small half inch chunks into one half of the pan and then turn the pan around and use another loaf of dough and cut into the other half of the pan like shown below.    Here is the cinnamon sprinkled over the dough. Preheat your oven to 350 degrees. Don’t forget to take the plastic wrap off of the pans. Now pour the caramel sauce over the dough dividing it up between the two pans. Put both pans in the oven and bake for 25 minutes. If your oven runs hotter than most, you might want to try 20 minutes. The tops must be a nice brown color when they are done. I like 25 minutes it is perfect for my oven so you may have to wing this part of it. If they are not completely done they will fall in the middle when the rolls cool. While they are cooking, wash up all your utensils. Also prepare some pans for dumping them onto. I like to line the metal tops of my baking pans with a large piece of tin foil. Not everyone has metal tops that came with their 9 x 13 pans so you can also use just a cookie sheet. I like to use the tin foil because when I set the pan and foil on top of the pan I am going to flip I kind of pull the tin foil down around the bottom pan. Then I grab both pans together tightly and flip the whole thing over and the rolls plop out of the baking pan and onto the cookie sheet. I also pull the side of the foil up around the rolls. That way I can loosely put a sheet of tin foil over the top while it cools. Not too tight, you want the warm air to escape but I do not want a fly or any other insect to get in there! |
 |
| Ooey Gooey Sensation! |
 |
| I pull the foil up around the rolls. |
 |
| Loosly cover with foil. |
Once they are cool, cut each pan into 12 rolls or 6 large rolls per pan.
Suggestion: If you really want to really WOW someone, put chopped pecans on the bottom of the pan before you put in the dough and then use Butter Pecan Ice Cream in your caramel sauce instead of the New York Vanilla. When you flip them over on the pan the nuts will be on the top and they are a very buttery nutty roll.
Last Loaf of Dough
You may be wondering why there is an extra loaf of dough left. Well, they always came in a package of 5 loaves. I use the extra dough for a homemade pizza. Just pull it to flatten it out into a large cookie sheet making a little lip to hold the sauce. Add some pizza sauce, all the toppings you want, add a ton of mozzarella cheese and bake in a 400 degree oven for about 15 minutes. Watch it closely. I highly recommend precooked meats only. (hamb. sausage, chicken..etc.
Chicken Alfredo Pizza
1 loaf of frozen bread dough. thawed
1 cup of cooked chicken chunks, I prefer white meat
1 jar of Garlic Alfredo Pasta Sauce
1 Can of sliced Olives
1 jar of pimentos- chopped, I use about 1/2 of the jar
1 - 8 oz. package of Mozzarella
Spread out the dough in a pizza pan or cookie sheet. You have to use your hands for this. Make a lip to hold the sauce. Spread the Alfredo Sauce over the dough. You might not need it all. Use as much as you like. Sprinkle the chicken all over the pizza, top with olives and pimentos and sprinkle the cheese over the top.
Bake at 400 degrees for about 20 minutes. Check it often.
These are not a diet foods but you will be happy and will be tootin' gluten for 24 hours.
Saturday, January 29, 2011
CALENDAR OVERLAY WITH INVISIBLE BACKGROUND
A friend of mine was wondering how to put a picture in the background of a calendar page and was wondering if I knew now. WelI I didn't! I went and watched a You Tube video and then tried it on my own. It worked out so well that I decided to share the file. I used Photoshop Elements 8 for this project.
This is an example of what I did. I am not going to explain this in too much detail. If you know how to use a graphic program this will be very easy. Especially if you know how to use layers. Even if you are not real familiar with those programs this Calendar page has an invisible background and anything will show through it if you put it over the top of it. You could even have a collage of words for a background or a scanned sheet of paper or fabric. Just call up this file as if you are adding a photo to the picture you already have as a background.
In my photo, I made a layer with the lilacs and a layer with my dog. I then pulled the blank calendar over the top of all of it. Now I can add numbers that will fit the month and I can also add the name of the month above it and also add events, birthdays, anniversaries etc.
This also works in Microsoft Word. Just bring in your photo and then bring in the Calendar file and lay it over the top.
 |
| I haven't added the numbers on my calendar yet. I was just experimenting with it. |
| Download the BLUE calendar grid HERE. |
| Download the PINK Calendar Grid HERE |
| Download the WHITE Calendar Grid HERE. |
| Download the BLACK Calendar Grid HERE. |
| There are no days of the week on this one in case you like to make your Calendars starting with Monday. Download the BLACK Blank Calendar Grid HERE. |
(Thanks to my friend Dennis for such a great idea!)
Friday, January 28, 2011
LET IT SNOW, LET IT SNOW, LET IT SNOW, oh, crappola
Yes, we are getting pretty sick of the snow. We are having one heck of a time finding the road. I have no idea how the blade operator can even see where it is after a snow storm. Once it snows and blows, there is nothing but white in the bright sunlight and heaven forbid...try driving at night like I have to...and the road just does not exist.
THEN...along comes winter. Ripping around the corner of the house like a locomotive, howling like a pack of wolves in heat and snow so thick you can’t see in front of your face. You are constantly bundled up with enough clothing you could roll down a hill and never get hurt. (If we had a hill.) The cold is so bitter that you can’t breathe and vehicles burn up more gas just warming up than it takes to get to work. We are not wasteful we just like to be able to breathe when we drive. I tried holding my breath once but it was so cold I stayed blue for a week. We are not Smurfs. Yep, it pretty much blows the heck out of the relaxing summer we just had. Kind of makes you want to go out and rip that sign down that says…Welcome to North Dakota…and put one up that says, ENTER AT YOUR OWN RISK! They say it keeps out the riff raff. Oh, no, they are here because you have to be a little crazy to live here year ‘round.
So it goes…come on…share a day with me…the sun did shine for these photos.
I know by now you are pretty excited about North Dakota.
Do you ever wonder why our unemployment rate is the lowest in the nation? It's because you will want a job, any job just to keep moving so you don't freeze to death. And also, don't you think maybe, just maybe, you might get a bit tired of staying home and looking at this? Yes, work is nice.....
Well, yall come back sometime! Ya hear! Maybe spring?
I wanted to share a few photos of just what it is like to live where I do. It is wonderful in the summer, traffic seldom goes by, the air is very clean, and you can always hear the birds singing. There is usually wind in North Dakota and it makes our trees rustle like the sound of an ocean right outside our window. Kind of cool sounding...very relaxing indeed.
THEN...along comes winter. Ripping around the corner of the house like a locomotive, howling like a pack of wolves in heat and snow so thick you can’t see in front of your face. You are constantly bundled up with enough clothing you could roll down a hill and never get hurt. (If we had a hill.) The cold is so bitter that you can’t breathe and vehicles burn up more gas just warming up than it takes to get to work. We are not wasteful we just like to be able to breathe when we drive. I tried holding my breath once but it was so cold I stayed blue for a week. We are not Smurfs. Yep, it pretty much blows the heck out of the relaxing summer we just had. Kind of makes you want to go out and rip that sign down that says…Welcome to North Dakota…and put one up that says, ENTER AT YOUR OWN RISK! They say it keeps out the riff raff. Oh, no, they are here because you have to be a little crazy to live here year ‘round.
So it goes…come on…share a day with me…the sun did shine for these photos.
 |
| Of course our dog drinks Aquafina and he never goes on a road trip without it! Doesn't yours? |
 |
| He knows he buried a bone right there just last summer. Yes, winter is tough on the Willy dog. He seems to love the cold except when he has to poop. He will get halfway done, it freezes and it just snaps off. He never knows if he's done or not. |
 |
| Here is my road going east. |
 |
| Here is my road going west. |
Can you really tell what direction you are going?
Do you ever wonder why our unemployment rate is the lowest in the nation? It's because you will want a job, any job just to keep moving so you don't freeze to death. And also, don't you think maybe, just maybe, you might get a bit tired of staying home and looking at this? Yes, work is nice.....
 |
| Here is our farm from a distance. |
This is as close as we want you to come without an invite...so says hubby.
 |
| Here is our house from the end of our driveway. This is where hubby would like a gate...with a huge lock! I let him think he really is tough... |
Well, yall come back sometime! Ya hear! Maybe spring?
SALT AND PEPPERS SHAKER SVGs
OK...Some of you may want to take my stories with a grain of salt. So be it...but you might also want to take them with a little pepper too!
 |
| Click here to download SVG |
Who doesn't need a little spice in their life?
You could add little sparkles or glitter to simulate salt coming out of a tipped shaker and maybe small beads for pepper?
Tuesday, January 25, 2011
HEART STAMP
 |
| Click here to download SVG This is in two pieces, the shadow is already made for it as it shows in the picture. |
Heart Borders
 |
| Click here to download SVG |

HEART CARD FRONT
 |
| Click here to download SVG |
HEART KISS STAMP
 |
| Click here to download SVG |
This is just a little stamp to add to an envelope or card.
I'm raising my prices if Hubby
forgets February 14th...maybe 10 cents a kiss!
forgets February 14th...maybe 10 cents a kiss!
HEART SWANS
 |
| Click here to download SVG |
Saturday, January 22, 2011
Canning Jar SVG
I see there was a request for a Mason Jar on my Yahoo boards. I don't have a "Mason Jar" but I did make a canning jar. This was a lot of fun once I decided that not only do I have a SVG of a jar I now have a SVG that will come in really handy to add texture to.
Those of you that have not had the fun of adding texture to your SVGs now is the time to learn. I am giving these instructions using Make the Cut Software. I do have SCAL but I haven't used it for so long that I don't even know if they have this feature!
Step 1. Click on the object you want to add a background to. This is what they call "texture".
Step 2. Right click on the object and Select "Change Color/Texture" and then "Select Texture"
Step 3. The next box will open and that is where you can decide what you want for a background.
It is also in this box that you can decide if you want it at an angle, how big of a design and if you want to tile it across the design or just a single picture. For some reason mine will occasionally open right up in the file that I keep my backgrounds. Maybe it just reads my mind. Just play with it for awhile. If you don't like the texture you have chosen, go back and do it all over again.
OK…now for a couple of ideas.
First of all you can put anything in these jars that you might want on a card or a scrapbook page.
This one I changed the texture to include Jelly Beans and a screw type lid made by angling some line art.

This also is very nice to use the Print and Cut feature in the Make the Cut software. No need to buy that expensive Cricut Imagine. My printer and my Cricut Expression work very well together and yours should too. Save that money for more paper and glue!
This next one is for all the grandparents that wish the grandkids would stay little forever. Well, they can! All you have to do is "Preserve" them in a canning jar!
Pet Photos
Photos Stretch to look like they are tightly squeezed in a jar.
Butterflies
Frogs
Insect Jar
Gross Science Project
Picture of your home/farm
Make it a label on a real jar
Tags
Cards
Double it and make into a holder for candy bars or snacks
Jar full of words
Jar of poetry
Jar full of numbers
Have Fun!
Here is the jar with and without a lid. I know, pretty simple but THERE IS MORE!!
 |
| Click Here to download SVG |
 |
| This SVG will have the jar, oval shape and lid all separate on the mat. It will come into your mat as one. Just select and click "Control B". This will make them into separate designs and then you can do with what you wish. |
Those of you that have not had the fun of adding texture to your SVGs now is the time to learn. I am giving these instructions using Make the Cut Software. I do have SCAL but I haven't used it for so long that I don't even know if they have this feature!
Step 1. Click on the object you want to add a background to. This is what they call "texture".
Step 2. Right click on the object and Select "Change Color/Texture" and then "Select Texture"
Step 3. The next box will open and that is where you can decide what you want for a background.
It is also in this box that you can decide if you want it at an angle, how big of a design and if you want to tile it across the design or just a single picture. For some reason mine will occasionally open right up in the file that I keep my backgrounds. Maybe it just reads my mind. Just play with it for awhile. If you don't like the texture you have chosen, go back and do it all over again.
OK…now for a couple of ideas.
First of all you can put anything in these jars that you might want on a card or a scrapbook page.
This one I changed the texture to include Jelly Beans and a screw type lid made by angling some line art.

This also is very nice to use the Print and Cut feature in the Make the Cut software. No need to buy that expensive Cricut Imagine. My printer and my Cricut Expression work very well together and yours should too. Save that money for more paper and glue!
This next one is for all the grandparents that wish the grandkids would stay little forever. Well, they can! All you have to do is "Preserve" them in a canning jar!
 |
| I have no idea who this child is. It is just a stock photo. Believe me, if I had grandkids they would be plastered all over this blog! |
How about these ideas?
Old PhotosPet Photos
Photos Stretch to look like they are tightly squeezed in a jar.
Butterflies
Frogs
Insect Jar
Gross Science Project
Picture of your home/farm
Make it a label on a real jar
Tags
Cards
Double it and make into a holder for candy bars or snacks
Jar full of words
Jar of poetry
Jar full of numbers
Have Fun!
DOG BONE SLIDER
I made this in tribute to a fellow Yahoo board member who has recently lost her crafting buddy and best friend, MAX.
I have wanted to make something like this for some time for myself and this was the push to complete it. I know there are other things that you could use it for.
How about a card background with Dalmatian Spots or paw tracks and one of these sayings for the dog lovers in your life:
OK…I know there are better ones than that but thought I would stir the creative juices!
I have wanted to make something like this for some time for myself and this was the push to complete it. I know there are other things that you could use it for.
How about a card background with Dalmatian Spots or paw tracks and one of these sayings for the dog lovers in your life:
“Doggone it”….:, I forgot your birthday”
“Who says you can’t teach an old dog new tricks?”…….Congratulations on your new job!
"I have a bone to pick with you”………..
“Make no bones about it”…..You are a year older!
OK…I know there are better ones than that but thought I would stir the creative juices!
 |
| This comes with a shadow background and the pieces are separate on the mat. There are slots in the shadow also for slipping a ribbon through. Click here to download SVG |
FOUR LEAF CLOVER
Of course this will bring a windfall of good fortune! If not...look around, I bet you are luckier than you think. If you think it could be worse...guess what?...you are lucky it isn't!
Hey…Life is what you make it!
 |
| This comes in two pieces on the mat so you can put the stem any where you wish. Click here to download SVG |
Friday, January 21, 2011
Heart Oval
Someone was looking for an oval with hearts around it. I am not sure what they wanted but here is something I came up with. It is layered so you could stamp in it or add a picture of some sort.
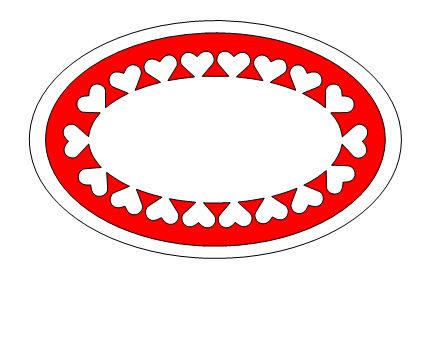 |
| Click here to download SVG |
HIP AND KNEE JOINTS
There was a request for a knee or hip and I decided to make something that might be movable. I made a stable one and one that you can add a joint. I would love to see what someone comes up with on this one!
 |
| Click here to download SVG |
MARCH...IN LIKE A LION...OUT LIKE A LAMB SVGs
I know, I am early on this one but I decided to be optimistic that spring will arrive. I am hoping it will come in like a lion and go out like lamb. Up here we do have a tendency to have it come roaring in like a locomotive and leave the same way...it's North Dakota...things happen........
Well, here is a lion and a lamb in case you might be able to use it.
Well, here is a lion and a lamb in case you might be able to use it.
 |
| Click here to download SVG |
 |
| Click here to download SVG |
Thursday, January 20, 2011
JUGGLING SEAL

Click here to download SVG
LAMP SHADE svg
Click here to download SVG
 |
| There was a request for this. Not sure what I would use it for but I am thinking I should probably look through some old party photos...just in case it needs to be added! This is a pieced SVG. The pieces are separate for the blue part and a whole piece for the yellow. |
Sunday, January 16, 2011
DEAD TREES TURNED INTO ART
Well, Hubby has been hard at it again. He bought a new book last summer called "The Art of Segmented Wood Turning by Nalcolm Tibbetts. He wanted to bump up his talents with something a bit more challenging. He also has received some nice chunks of wood from our girls so he had to turn them into something.
It always amazes me how much
a dead tree can bring him to life!
 |
This was his first attempt at Segmented Bowls. This is made of Maple and Mahogany. This was his second attempt. This is made out of Maple and Russian Olive. The Russian Olive has some beautiful wood in it but it doesn't get very large. It works great for smaller projects but I wish it could be made into furniture. It is the darker wood in the object. |
 |
This bowl is almost prettier on the inside. I have no idea why this photo looks so yellow. It really looks more like the photo above it.   wood in it is so beautiful. This picture doesn't do it justice. It is made out of Cocobolo.  My daughter and her hubby are having a "Trip Around the World Party" and they are going to make Lefse. She asked her Daddy if he would make her some Lefsa sticks and of course he said yes....spoiled little girl! |

Lefse Sticks
 |
| Wood burned decoration in the handle |
I didn't get a very good picture but these are what we call Lefsa sticks. It is used to take the thin dough off the floured rolling board and place it on a hot Lefse grill. You also use it to remove the Lefse from the hot grill. You almost feel Ninja- like when using it...well almost. Really hard to be Ninja-like when you have butter running down your chin from testing the first piece of Lefse. For those of you with no Scandinavian blood ...you have my sympathy. If you don't know what Lefse is then you have not feasted with the Lutefisk Gods. It is a very thin almost tortilla-like bread made out of mashed potatoes along with some flour, sugar, butter, cream, etc. THEN when you eat it, you add more butter and sugar. Hard to believe that the Scandinavians have not died out from high cholesterol! Well for one...I am still here!
My daughter and I try to get together to make Lefse every October for the holidays and of course there is never any left. I wonder if she will share some of hers from the party?
Here is a link to see for yourself how it is made. They have a very nice tutorial.
Here is a link to see for yourself how it is made. They have a very nice tutorial.
1930's QUILT
Information for Quilters:
These quilts are 82 x 82 and were designed using Electric Quilt 7 software. Fabric is from Connecting Threads and I used the Canning Day Jelly Rolls because there was no way I was parting with anything in my stash!
 |
| Here is one of the quilts I did in December. For some reason I decided at the last minute to make my girls each a 1930's quilt. They have been eyeballing my stash of 1930's reproduction fabrics for quite some time. I always thought I would make myself an old fashioned looking quilt. I still will someday What was I thinking? I was sewing like a crazy woman but then again...that would be normal! I had a hard time explaining why I didn't get much done for Christmas this year until after they opened their gifts. Then they understood perfectly what I had been up to. I had vacation piled up until December 9th and was off until Jan. 3. Oh, it was a lovely "staycation"!  My youngest daughter didn't want to use hers so she went to Home Depot and bought a curtain rod and is using it for Wall Art...Oh, I feel so honored! Her quilt is almost like the other one but it has that goofy green turquoise color you see in some of the blocks instead of the peach color around the outside. I know, it looks blue on this photo. I didn't want to decide which girl got which quilt so I didn't put names on the packages and made them chose which one they wanted to open. Believe me...it is so nice to know they have grown up and not still fight like they used to! |
These quilts are 82 x 82 and were designed using Electric Quilt 7 software. Fabric is from Connecting Threads and I used the Canning Day Jelly Rolls because there was no way I was parting with anything in my stash!
Subscribe to:
Posts (Atom)